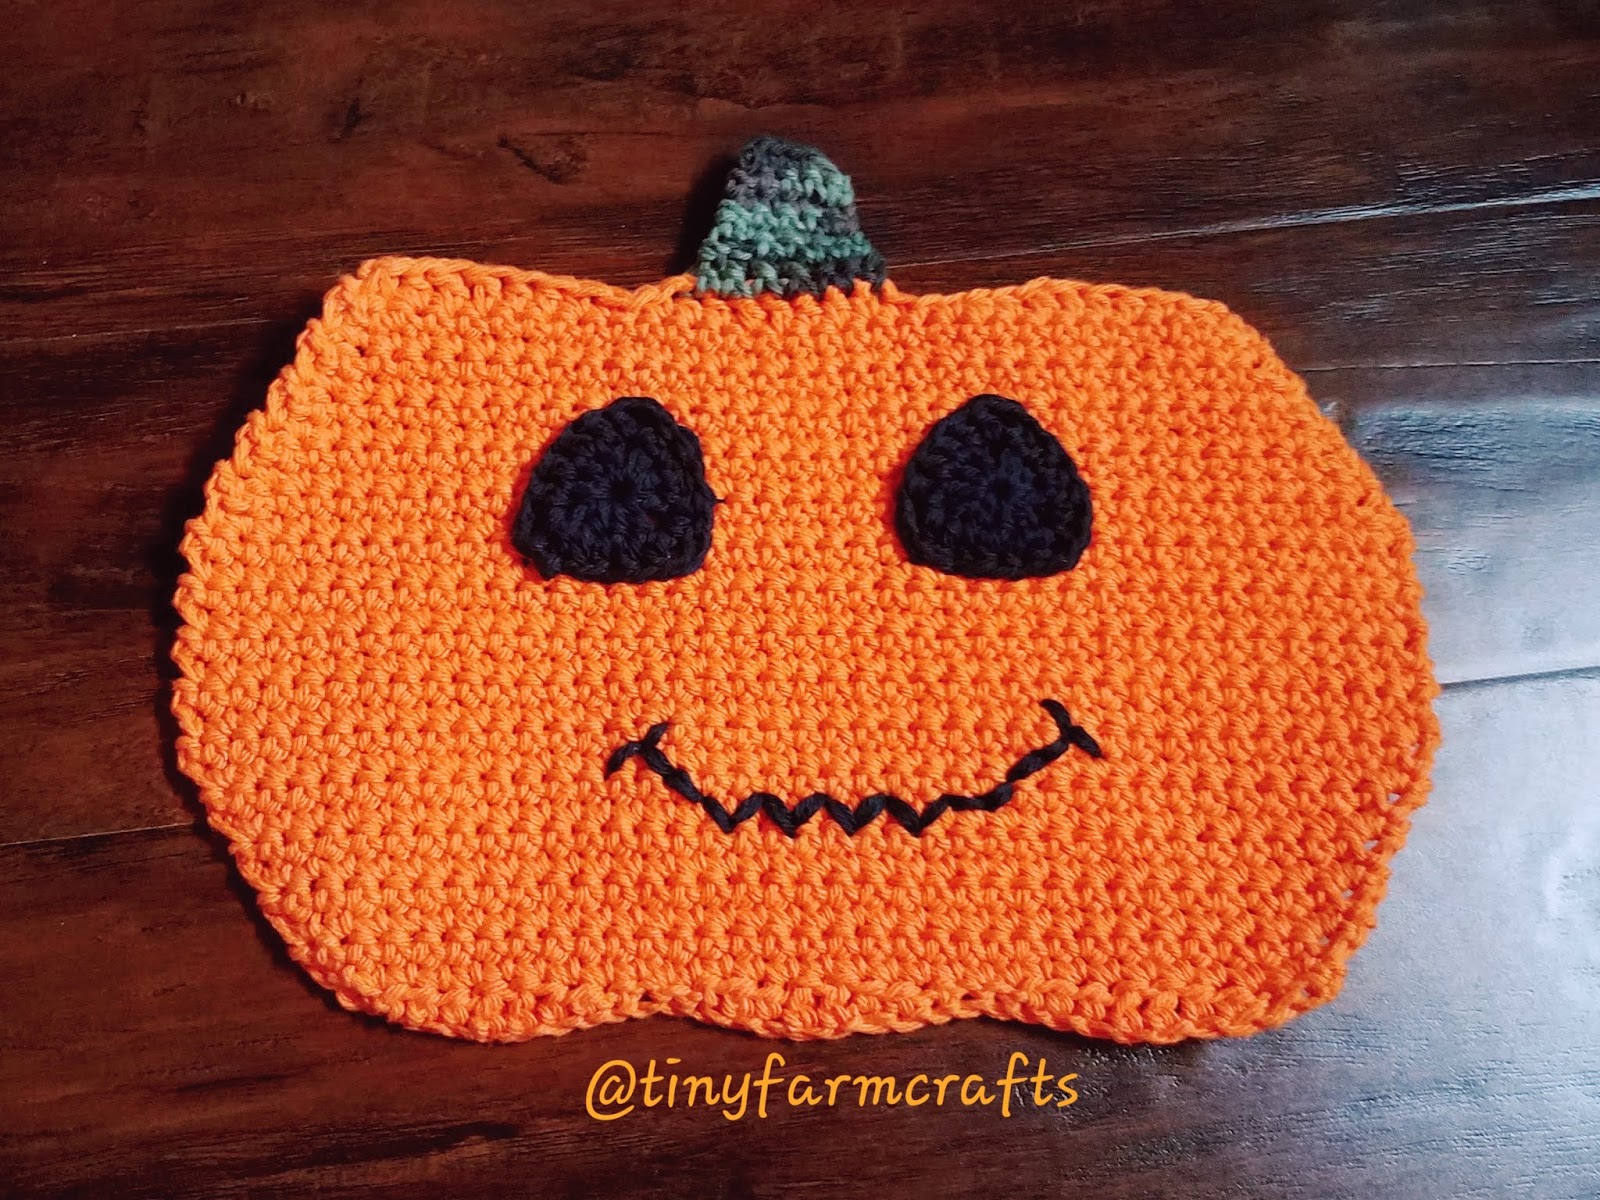
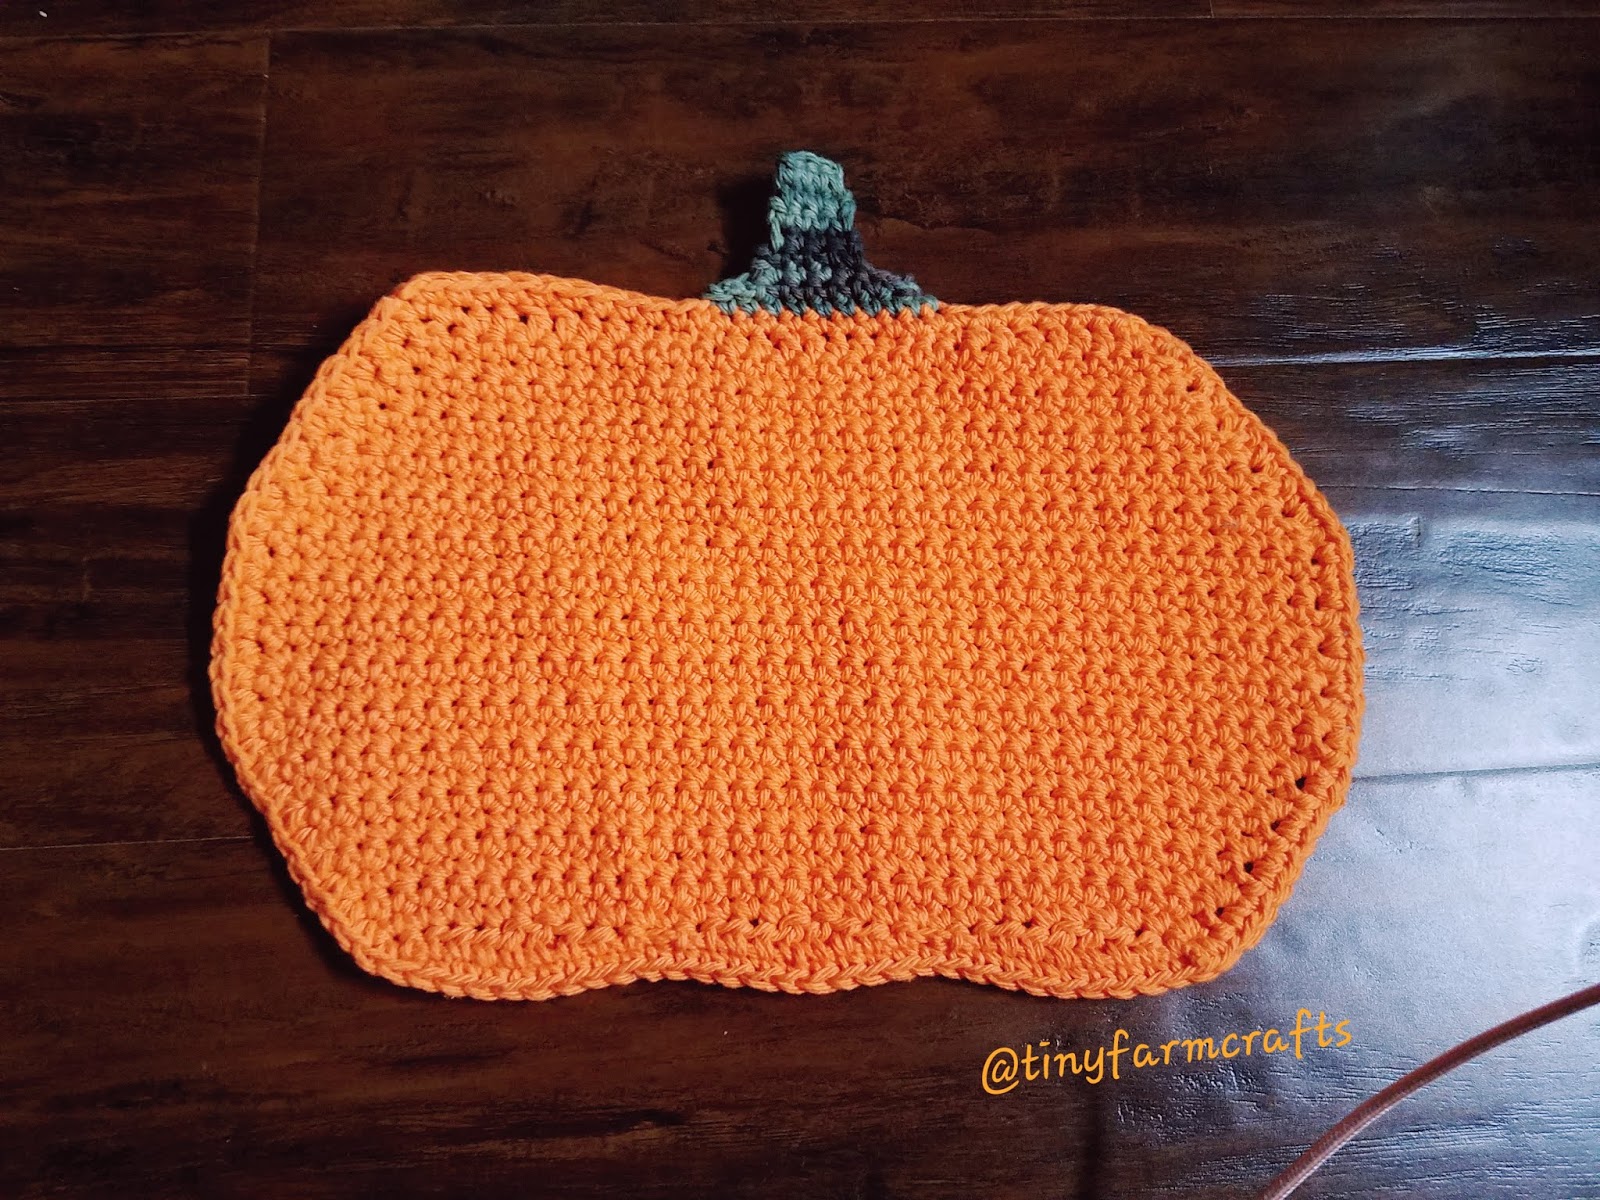
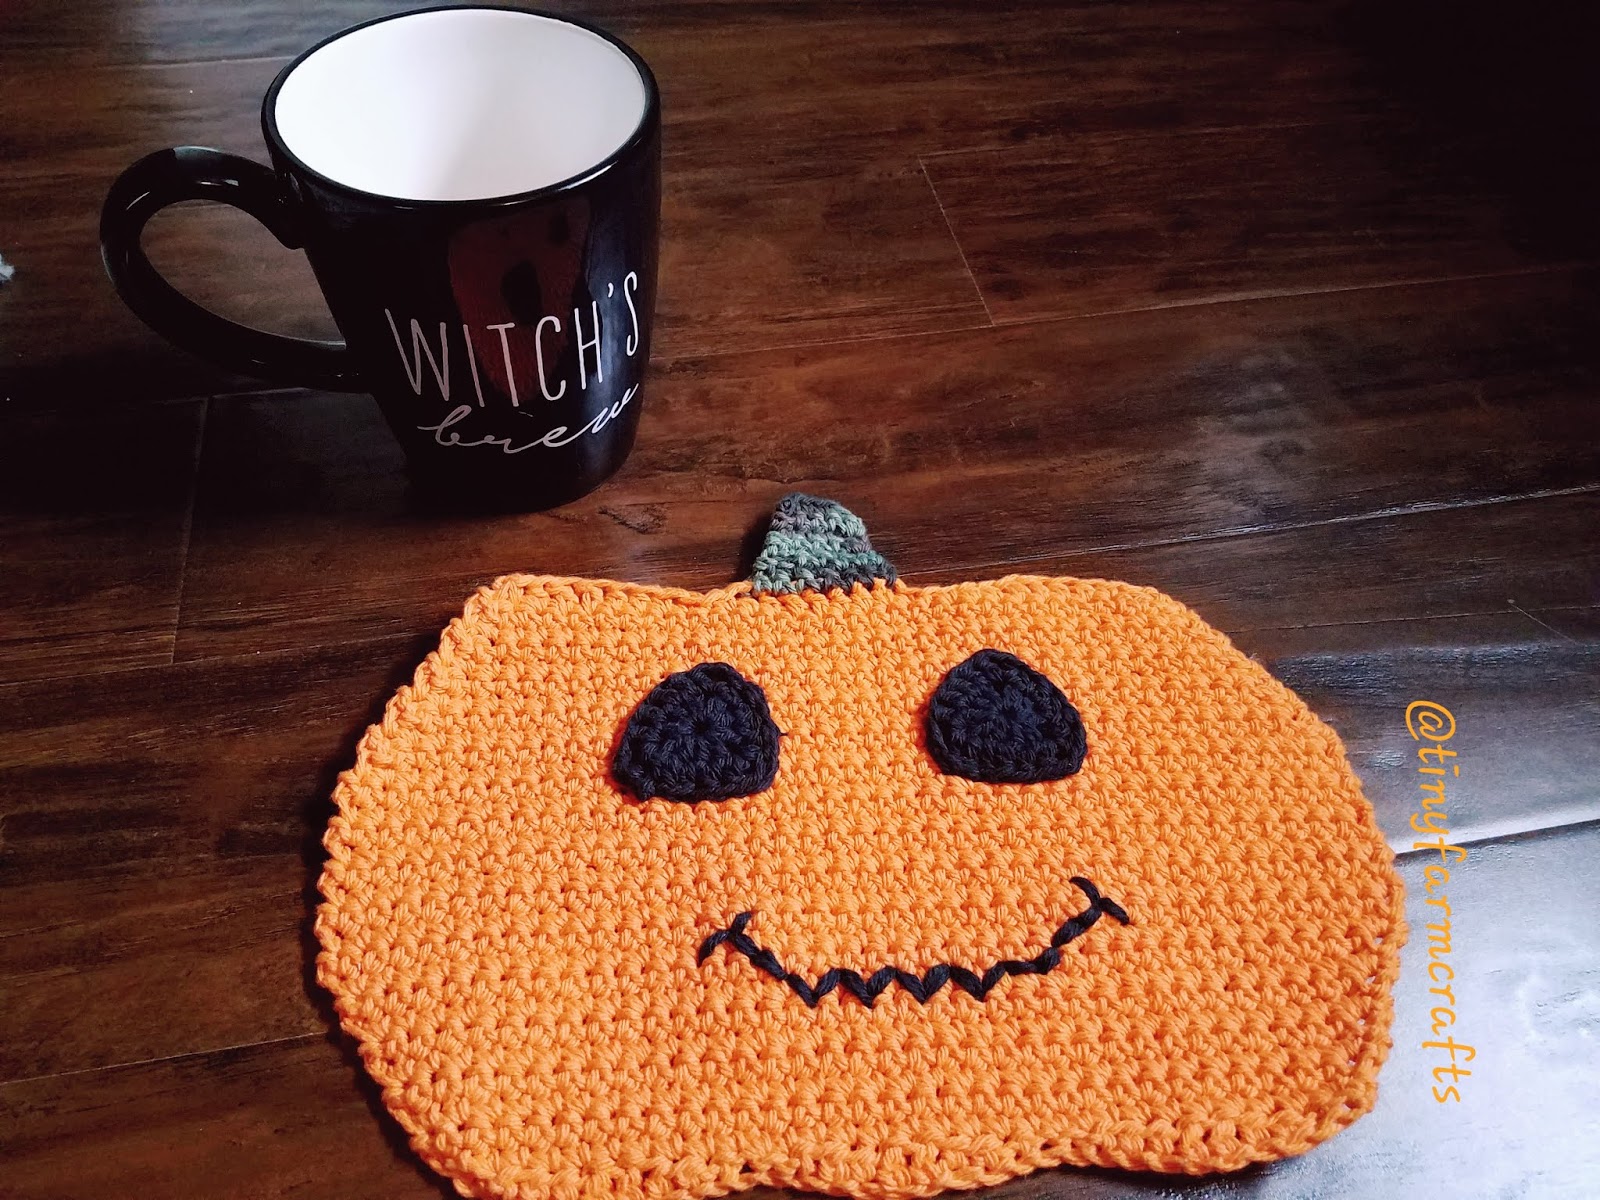
This fun Pumpkin Dishtowel or Pot holder is a quick, beginner friendly project. Its a basic pattern that repeats and works up quickly. Lately, I have been decorating slowly for Halloween, and making some new things and wanted to make a cute Halloween Kitchen Decoration, and I love Lily Sugar n’ Cream cotton yarn for things in the kitchen.
Materials:
This uses H/ 5.0mm hook. I used my H hook from Clover Amour;
1 ball Lily Sugar n’ Cream in Hot Orange
1 ball Lily Sugar n’ Cream in Renegade
1 ball Lily Sugar n’ Cream Black
PUMPKIN:
Chain 31
Row 1: *sl in to second ch from hook, sc in next ch, 1 hdc in each of next 2 ch, 1 dc in each of next 2 ch, 1 hdc in each of next 2 ch, sc in next ch, sl in next ch.; repeat from * until end. Last stitch should be sl in to last chain. Ch 1 and turn.
Row 2: 2 sc in first stitch, sc in next 28 stitches, 2 sc in final stitch; ch 1 and turn
Row 3: sc in each stitch across; ch 1 and turn
Row 4: 2 sc in first stitch, sc in next 30 stitches, 2 sc in final stitch; ch 1 and turn
Row 5: sc in each stitch across; ch 1 and turn
Row 6: 2 sc first stitch across; sc in next 32 stitches, 2 sc in final stitch; ch 1 and turn
Row 7: sc in each stitch across; ch 1 and turn
Row 8: 2 sc in first stitch, sc in next 34, 2 sc in last stitch; ch. 1 and turn
Row 9: sc in each stitch across;
Row 10: 2 sc in first stitch, sc in next 36, 2 sc in last stitch; ch. 1 and turn
Row 11- 20: sc in each stitch across, ch. and turn
Row 21: sc2tog, sc in each stitch across up to last two stitches, sc2tog in last two sc; ch 1 and turn
Row 22: Sc in each stitch across
Row 23: sc2tog, sc in each stitch across up to last two stitches, sc2tog in last two sc; ch 1 and turn
Row 24: sc in each stitch across
Row 25: sc2tog, sc in each stitch across up to last two stitches, sc2tog in last two sc; ch 1 and turn
Row 26: sc in each stitch across; ch 1 and turn
Row 27: sc2tog, sc in each stitch across up to last two stitches, sc2tog in last two sc; ch 1 and turn
Row 28: sc in each stitch across; ch 1 and turn
Row 29:sc2tog, sc in each stitch across up to last two stitches, sc2tog; ch 1 turn.
Row 30: sc2tog, across the row: hdc, hdc, dc, dc, hdc, hdc, sc, sl, sl, sc, hdc, hdc, dc, dc, hdc, hdc, sc, sl, sl, sc, hdc, hdc, dc, dc, hdc, hdc, sc2tog. Fasten off. (Or add sc trim all the way around pumpkin shape).
Stem: attach Renegade color to the 11th stitch from the side (second stitch on the center lump of the pumpkin shape).
Row 1: Sl in stitch where you attached, sc in each of the next 6 stitches, sl stitch in 7th stitch; ch 1 and turn
Row 2: skip first stitch, sl in to first sc from the row below, sc in each of the next 4 stitches, skip 1 stitch, sl to the sl from the row below,ch 1 and turn
Row 3: sc in to the 4 sc from the row below, sl in to the same stitch as the last sc, ch 1 and turn;
Row 4-8: repeat row 3 until stem reaches your desired length, I did 8 rows total, but you can easily have it shorter or longer.
You could stop here and have a super cute pumpkin, or continue on and add the Jacko’lantern face, for extra fun.
Eyes (make 2): ch two,
Round 1: 3 hdc in last ch from hook, ch 2, 3 hdc in same stitch, ch 2, 3 hdc in same stitch ch 2 and sl to top of first hdc.
Round 2: ch 1, *hdc in each of next 3 st, and 1 hdc in the ch 2 space, ch 2, 1hdc in the same space, repeat from * till you get back to the start. Sl in to the top of first hdc in the round, and fasten off, leaving a long tail to sew on to the pumpkin.
Mouth: I used two strands of black to stitch on a goofy mouth, I just treated it like a cross stitch, with how I attached it, and went through the single crochet fabric. You can easily do the mouth however you like, but if you intend on using it as a pot holder, I would stay away from the puff paint.