

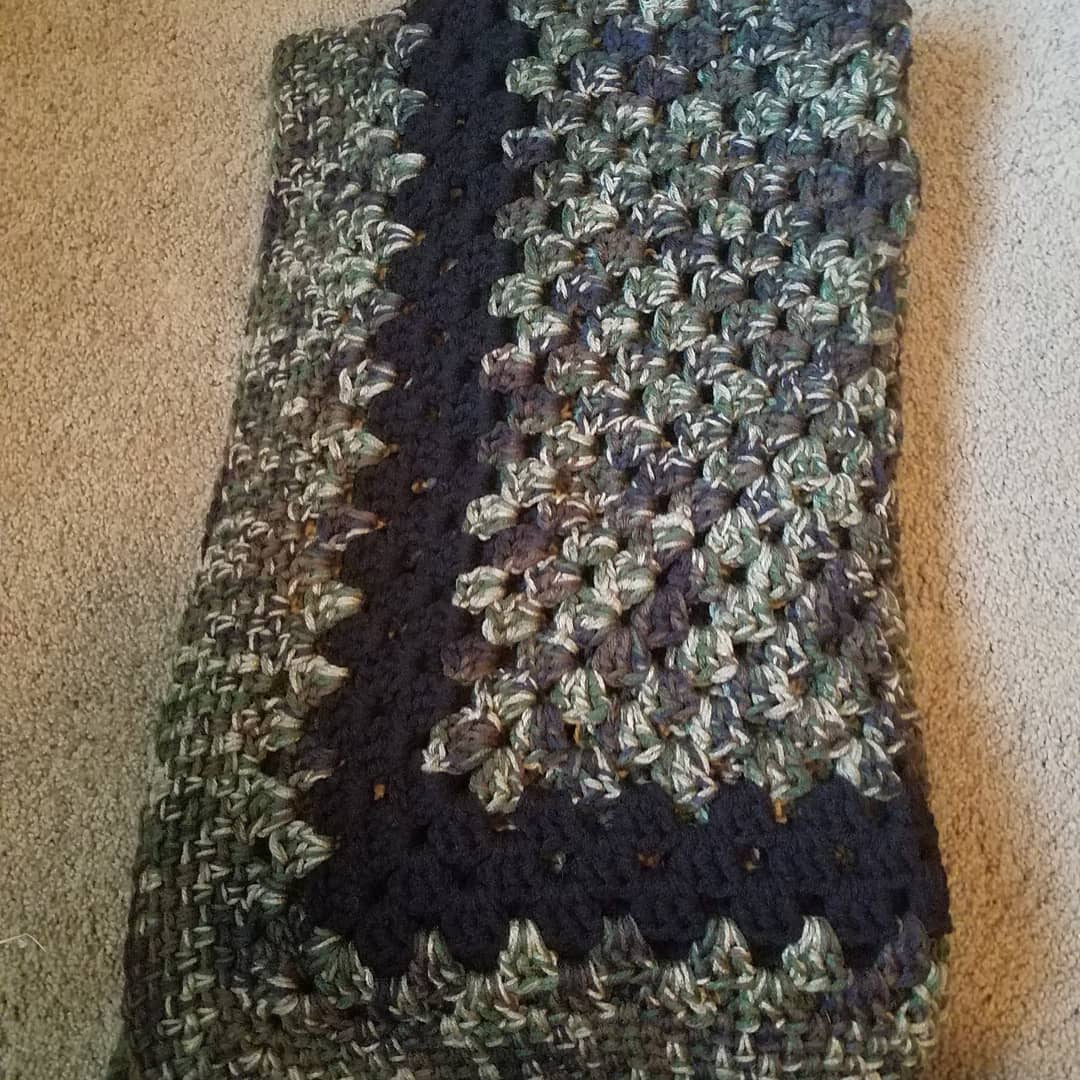
This cute throw/blanket started as a blanket for my friend’s husband, but I never liked how it was turning out. I started and frogged the project probably a dozen times. (I had it 3/4 done at one point).
When this was finally created, I was experimenting with chunky yarns, I finished one project (a dog/cat mat) and ended up grabbing my M/N hook from Clover and experimenting with the different stitches, and number of strands of yarn and I ended up loving the thickness and weight of two strands of Red Heart Supersaver in camo and the granny square stitch. It ended up being not to heavy (which is rare for Chunky anything) and not too airy. Its a perfect on the couch throw.
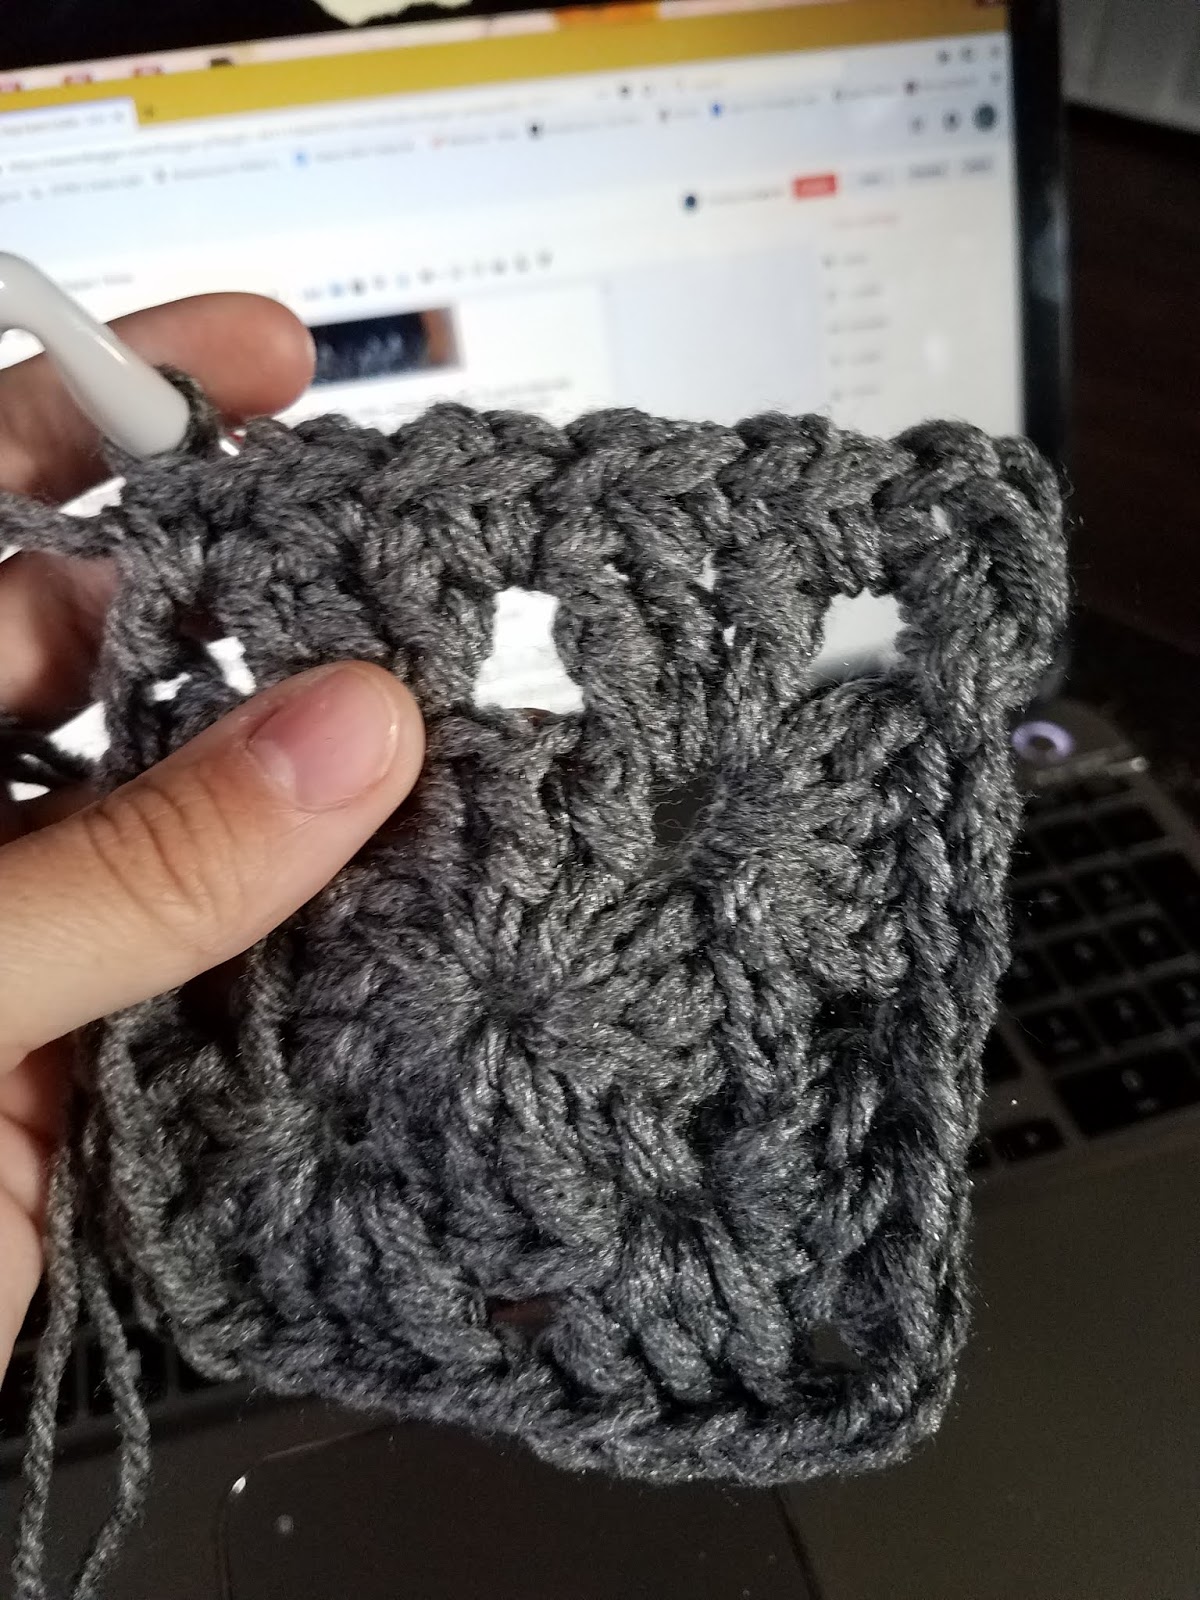
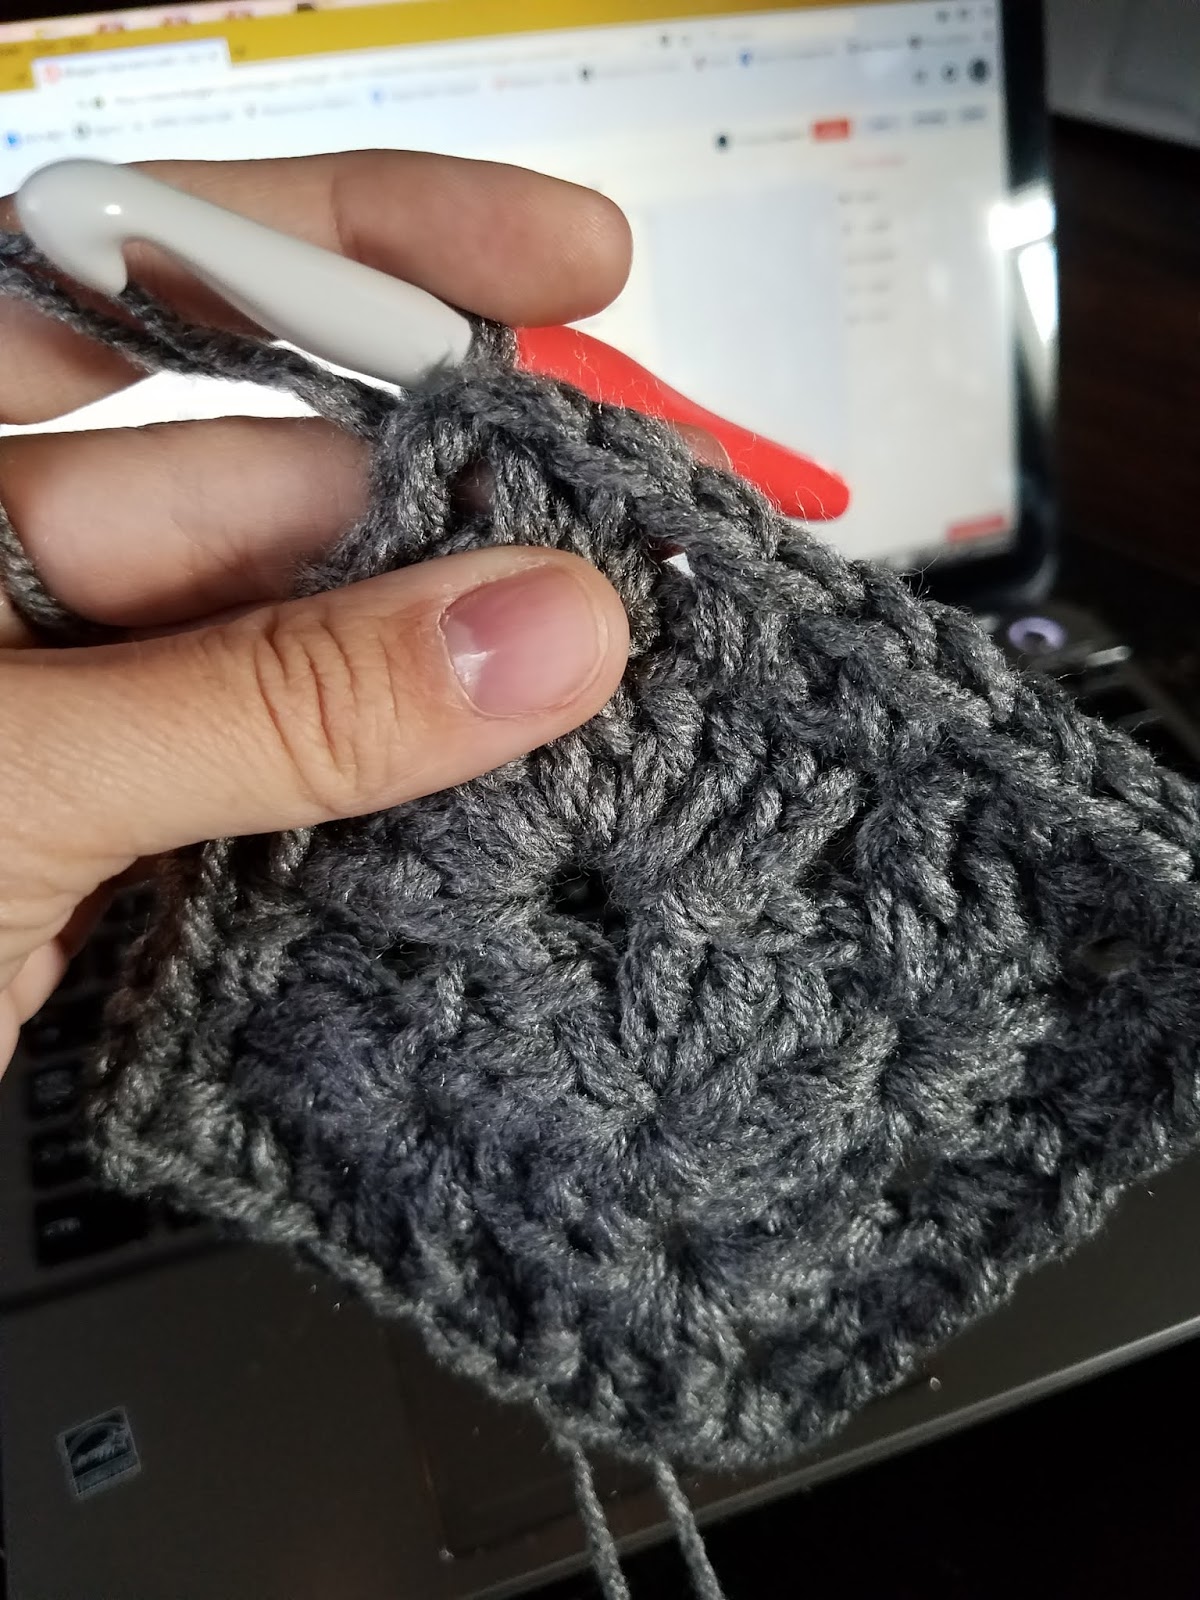
The Pattern is super simple, its a basic granny square with a moss stitch edge. It can be done any number of ways. For example, I am terrible at a magic ring, but you could start that way too.
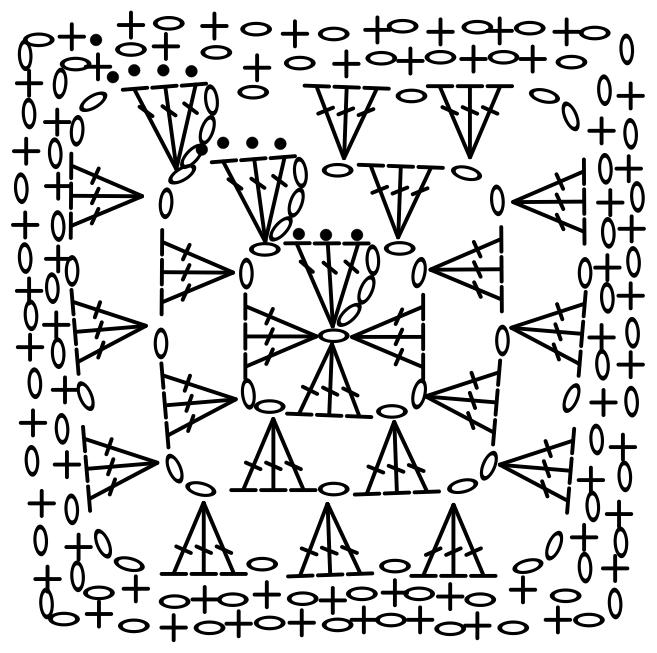
A chart for how I did this is below. It is a shortened version. 😁
Throw
Material: 4-6 Large skeins of Red Heart Supersaver Camo (depend on how wide you want the throw.
2 Medium skeins of Red Heart Supersaver Black
Hook: M/N Clover Amour hook
Starting with 2 strands of yarn:
Row 1: chain 4 in last stitch from the hook, 3 DC, ch 2, 3 DC, ch. 2, 3 DC, ch 2, 3 DC, ch 2, sl st to join to the first DC. — that makes the first square.

Row 2: sl st. across rest of cluster of DC, to get to the ch 2 on the corner, sl next to first chain, ch. 3, 3 DC, ch 2, 3 DC, ch 1, 3 DC at next corner, ch. 2, 3 dc, ch 1, 3dc at next corner, ch. 2, 3 dc, ch 1, 3dc, ch 2, 3 dc. ch. 1, sl st to top of 1st DC in square


Row 3: sl st across DCs to get to first gap between stitches, ch. 3,, 3 dc in first space, ch. 1, 3 dc at ch. 2, 3DC(this makes the corner) *ch. 1., 3 dc in next space between clusters, repeat till next corner, then repeat for corner. Repeat around till you get back to first st.

Row 4-27: repeat square pattern (for a larger throw continue until desired width)
For rows 23-26 i switched to two strands of Redheart supersaver black, then switched back to camo for row 27. Color change is easily done by picking up the new color when you go to chain three on the new row.
Moss Stitch Border
Row 28: Sl st across cluster of 3 dc and into corner, ch. 1, sc, ch 2, sc, (makes corner) *ch 1, sc, repeat from * till you get to next corner, repeat for corner, then repeat all the way around. Sl in to first sc.
Row 29-34: ch. 1 sc, ch. 2, sc, (this makes corner) *ch. 1, sc., repeat from * till you get to corner then repeat for corner.

I considered this complete but you could make the border wider as well. My finished throw is roughly 53″ square. You could block it and make it a bit wider. But i never bothered too.
Reference Chart:
I hope you enjoy!
